Image Map
Showing posts with label paint. Show all posts

Sunday, July 7, 2013

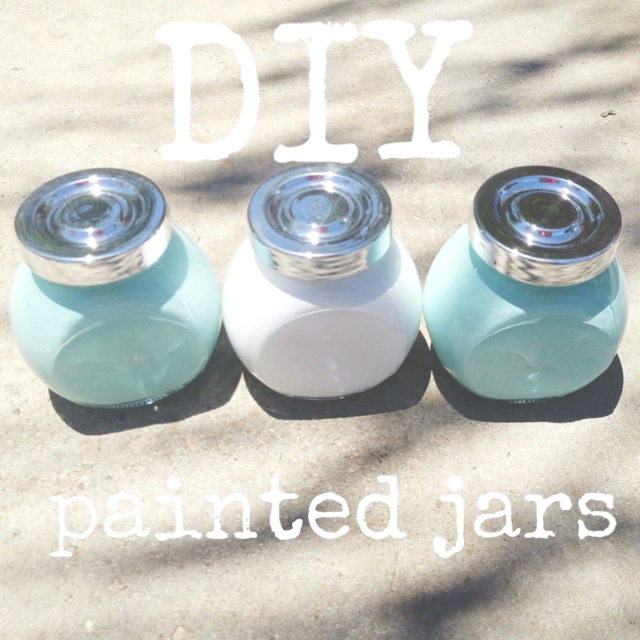
DIY Painted Jars


I hope everyone had a lovely 4th of July weekend, I'll post about mine soon but first, crafting!  Last weekend while at my parent's house I got this urge to craft.  I really haven't in a while but since I am moving again in a month I have been having this overwhelming urge again to craft and make things for the new house.  My mom decided to feed my jar fetish and bought me a three pack of small jars at the dollar store.  Of course I already have every size and shape of jar out there, but, despite seeing countless tutorials on Pinterest and other blogs I have not yet tried out the whole painted jar thing.  Since these were only a dollar I decided to give it a go.


The first thing that I learned about painting the inside of a jar is try not to look at the inside while doing it, the outside is what you are going to see so concentrate on how it looks from that angle.


The second thing I learned is to be very liberal with the amount of paint you put in that jar.  If you use little paint you are going to be able to notice, especially if you hold the jar up to the sun.  Because of this i decided to do several coats.

Besides those two things, there really are not rules.  I did mine by basically blotting the inside with a paint brush although I've seen a few people that put a drop inside the jar and swirl it around.  I cannot attest for that method but I can attest to the brush and blot method; mine turned out pretty cute I think...


I would definitely recommend running you your local dollar store and buying a couple of these babies to try it out.

Thursday, June 14, 2012

DIY Distressed Jewelry Stand


Hello lovelies! I have another DIY project that I actually completed last week.  I have more jewelry and knick knacks then I know what to do with so I can never have enough storage.  I saw this idea on Pinterest for a distressed jewelry stand made out of terra cotta pots and I thought it would be perfect and pretty easy to do.  I followed the link on Pinterest and the blog showmecute.com had an amazing tutorial on how to make it!  Visit the tutorial here and watch her video tutorial to find out how to make one!

I obviously did mine in brown, but you could do any color you want and I used Gorilla Glue to glue mine together and I believe in the tutorial I linked she uses super glue.  I'm just going to give you a couple tips if you do decide to use Gorilla Glue like I did: 1. READ THE DIRECTIONS COMPLETELY! I did not, it clearly states on the bottle to wet the surface you are gluing and yeah that does help, directions are there for a reason! 2. A little goes a long way, Gorilla Glue does expand so don't use too much. 3.  Gorilla Glue takes a few hours to dry so make sure you give it enough time to dry completely and do not touch it while it is drying.


Hope you guys enjoyed! Let me know if you try it too!

Tuesday, June 12, 2012

Revamping a Target clock

I've been looking for all sorts of cheap knick knacks to revamp lately because I'm moving in August and as most of you know twenty something students don't exactly have all the money in the world to furnish a home.  My mom gave me this old clock she got at Target a few years ago, she had broken the glass around the face and wasn't using it any more so I decided to redo it and make it look old and vintage.

Unfortunately I did not get a picture of the clock before I redid it.  I asked me dad to help me talk it apart so I could paint it and before I could take a before picture I turned around and the clock was in pieces. Thanks dad I guess for helping me out so quickly.  To give you a visual, beforehand the clock was a boring silver color and had cracked glass around the face.  It looked similar to this clock without the bells on top.
Because the glass was broken I just took it out and threw it away.  I then took all the silver pieces that I wanted to paint and laid them out on a piece of cardboard then primed them with a spray primer to help the paint stick.


I let that dry for about fifteen or twenty minutes before applying white spray paint over the primer.  I didn't need to worry about doing it perfectly because I was just gonna scuff it up later!


I let the white paint dry for a few hours while I went in to watch the hockey game. (Yeah LA Kings Stanley Cup champs!) After it had dried I took a piece of sand paper and scuffed up the edges, feet and some of the back to give it an old shabby chic look. Then I put it all back together and wa la! A cheap clock from Target is now a vintage decoration!